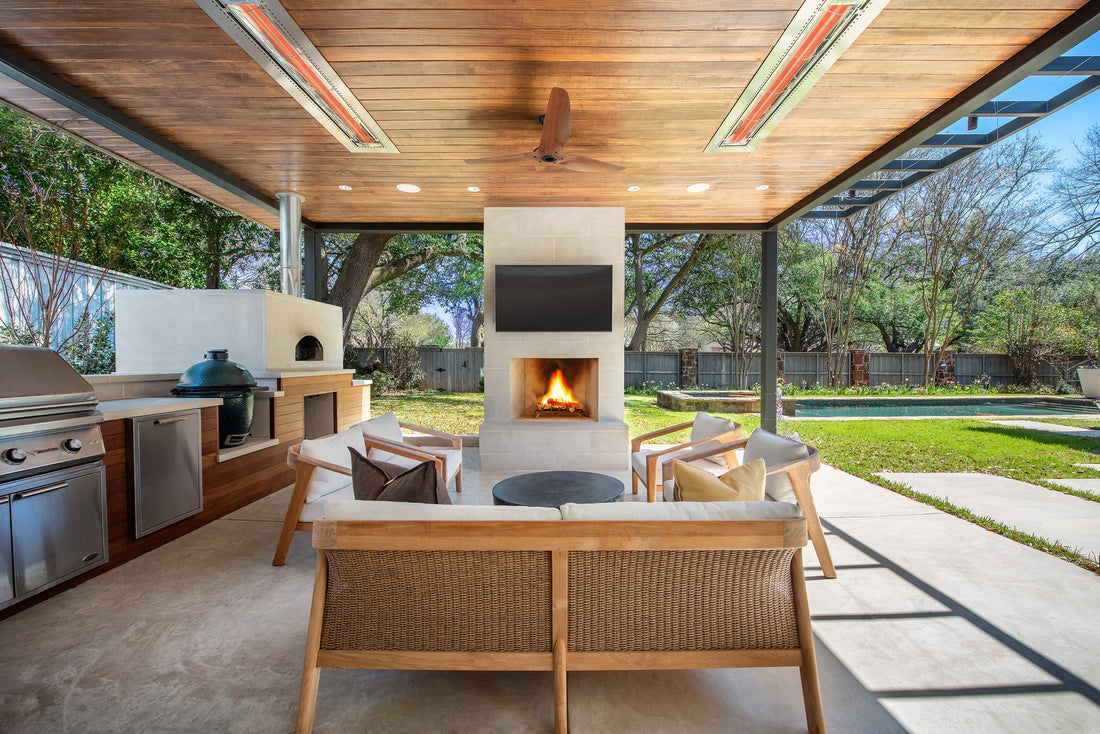
How to install recessed Infratech heaters (Flush Mount installation guide)
Share
Enhance Your Outdoor Space with recessed patio heaters
Installation Guide Below
Looking to elevate the comfort of your outdoor living areas without compromising on style? Flush-mounted Infratech heater offers a sleek, unobtrusive solution that integrates seamlessly into your space, providing warmth without the visual clutter. This guide will walk you through the steps of installing a flush-mounted Infratech W-Series or WD-Series outdoor heater, ensuring a clean and elegant look that complements your home’s design.

Why Choose Flush Mounting for Your Infratech Heater?
Flush mounting is a popular choice among homeowners, interior designers, architects, and premium home builders due to its clean and seamless appearance. Recessed heaters allow for a more subtle look.

Choosing the Right Heater and Frame
For flush mounting, the W-Series or WD-Series heaters are recommended due to their larger body size which allows for more effective heat dissipation within the pocket created by the flush mount frame. Infratech offers frames in three sizes – 33 inches, 39 inches, or 61 inches – compatible with heaters ranging from 1500 to 6000 watts. C & CD series can also be recessed. However, Infratech’s SL Series and the Motif collection of decorative fascias can not be flush mounted.
Usually, a larger heater will provide better coverage. We suggest, when possible, to choose the largest heater for the selected wattage. For example, the 4kW heaters are available in 39’’ (model WD) or 61’’ Model W). In that scenario, the W-4024 will provide better coverage.
Mounting frames are available in stainless steel and a choice of 8 colors.

Installation Guide
Preparation: make sure to respect recessed installation instructions.
Before beginning the installation, ensure the ceiling area is suitable. It should be flat with a minimum of 2-inch by 8-inch studs. Ensure the heater will face straight down and maintain safe distances from ceiling fans or light fixtures.

Remember to always use a licensed electrician for installation.
Full installation guide video
Step 1: Frame the Pocket
Construct a frame for the pocket that will house the heater using 5/8-inch Type X drywall, which is fire-rated for one hour. This containment is essential for safety and must adhere to the specific dimensions provided in the Infratech manual for different heater sizes.

Step 2: Mount the Junction Box and Run Wires
Install the junction box outside of the pocket and run the appropriate wiring from the power source to the junction box. Infratech provides a high-temperature whip for connecting the external junction box to the heater’s junction box.

Step 3: Install the Flush Mount Frame
There are two recommended methods for securing the frame within the pocket: either drill through the internal flanges or attach the frame using the faceplate. Both methods require careful handling to avoid damaging the frame.
Method 1: drill through the internal flanges

Method 2: drill through faceplate

Step 4: Heater Installation
Adjust the heater height using the adjustable tabs provided, ensuring it sits flush with your ceiling's finished surface. Once positioned correctly, make the final electrical connections, secure the heater in place, and complete any necessary adjustments.

Finishing Touches: Expose trim or covered trim.
After installing the heater, you may choose to leave the trim exposed or cover it with decorative materials that match your ceiling, such as drywall, plaster, stucco, or wood. Ensure there is a half-inch clearance around the ventilation holes to prevent overheating.

By following these detailed instructions, you can ensure your Infratech heater is installed safely and stylishly, adding both value and comfort to your home.
Enjoy Year-Round Comfort
With your Infratech heater flush mounted, your installation is complete, and you’re ready to enjoy enhanced comfort on your patio throughout the year.
For further assistance or if you encounter any issues during your installation, Infratech’s customer support is readily available to help you with additional technical support.
Discover our popular recessed Bundles.
Package: 4 x 6kW infrared heater WD Series Recessed - with Panel
Package: 4 x 4kW infrared heater W Series Recessed - with Panel
Package: 2 x 4kW infrared heater W Series Recessed - with Panel


